← Exit
Module 3 · Safe Practices for Abrasive Wheels0% complete · 23 slides left
Abrasive Wheels Course
Module 3
This course contains audio. Use headphones in public places.
Introduction
Introduction

In the previous modules we covered the main types of abrasive wheels and how they are used, the key precautions required by law, and how to carry out a risk assessment.

Over the next two modules you will learn the essential information about storing, handling, mounting, using and dressing abrasive wheels, and about the main hazards associated with them.

It is vital that anyone who works with abrasive wheels is properly trained and competent to do the job. Up-to-date information from the manufacturer or supplier must be available and clear to the people carrying out these tasks; this is a legal requirement, not just good practice. If you are in any doubt, contact the manufacturer or supplier for advice before you start.

Once you have completed this course and combined it with the manufacturer's information and your own risk assessment, you will be able to make sure that everyone understands their role in the safe use of abrasive wheels.

Topics to be Covered

This module covers the following topics:

  • The hierarchy of control
  • Wheel speed and the marking system
  • Storage and handling of wheels
  • Mounting the wheel
  • Guards and work rests
  • Safe working practices
  • Inspection and testing
  • Safe dressing of abrasive wheels

These are the practical skills that prevent the accidents described in Module 1. Take your time with the mounting and guarding slides in particular; they are where most serious wheel accidents begin.

The Hierarchy of Control
1 Eliminate2 Substitute3 Engineering controls4 Safe systems & training5 PPE — last resort
The Hierarchy of Control

The hierarchy of control requires employers to eliminate a hazard wherever that is possible. This may mean using different technology or equipment to do the work. For example, where workpieces only need occasional cutting, the job can often be done safely with cold-cutting techniques.

Where possible, employers should consider substituting abrasive cutting with alternatives such as waterjet cutting, band saws, shears or pipe cutters for occasional cutting tasks. These methods avoid the need for angle grinders and similar tools, which carry a wide range of risks.

If other processes are used, information on their safe use is still essential; every method has its own hazards.

If a hazard cannot be eliminated, action must be taken to reduce the risk. Engineering controls come first: guards, screens, work rests and dust extraction. Then safe systems of work and training. Personal protective equipment is the last line of defence, not the first.

Wheel Speed
Wheel: max operating speed (MOS)Machine: spindle speedSpindle speed ≤ wheel MOS — always
Wheel Speed

One of the main hazards associated with abrasive wheels is excessive wheel speed. Abrasive wheels must never be run at a speed higher than the maximum speed marked on the wheel.

Every abrasive wheel with a diameter of more than 80 mm must have its Maximum Operating Speed (MOS) marked on it. Do not use a wheel if this information is missing, damaged or cannot be read.

For wheels of 80 mm diameter or less, a notice clearly showing the maximum operating speed must be displayed close to where the wheels are used.

On every grinding machine, the maximum spindle speed must also be clearly displayed. For a machine with a range of speeds, all of the speeds must be shown. Before any wheel is fitted, the two numbers are compared: the machine's spindle speed must never exceed the wheel's maximum operating speed.

Wheel Speed — Overspeed
35 m/s → fragment at 126 km/h125 m/s → fragment at 450 km/h2× speed = 4× load on the wheel
Wheel Speed — Overspeed

Overspeed is one of the leading causes of wheel breakage, and a breakage at speed causes serious injury. To understand why, look at what happens to a fragment of a bursting wheel:

  • A fragment from a wheel bursting at 35 m/s travels at around 80 mph (126 km/h).
  • A fragment from a wheel bursting at 125 m/s travels at around 280 mph (450 km/h) — faster than a Formula One car.

You must never exceed the maximum speed marked on the wheel. Doubling the wheel speed increases the load on the wheel four times over, greatly increasing the risk of it bursting.

Abrasive wheels must only be mounted on the machines they are intended for. This may seem obvious, but accidents happen when wheels are used on the wrong machine, or when heavy wheels are fitted to spindles designed for much lighter ones.

Always seek advice from the manufacturers of the machine and the wheel when selecting grinding equipment, and never experiment without proper advice.

Wheel Speed — The Marking System
rpm + m/sDimensions: Ø × thickness × boreColour stripe = speed classPictograms = restrictions on use
Wheel Speed — The Marking System

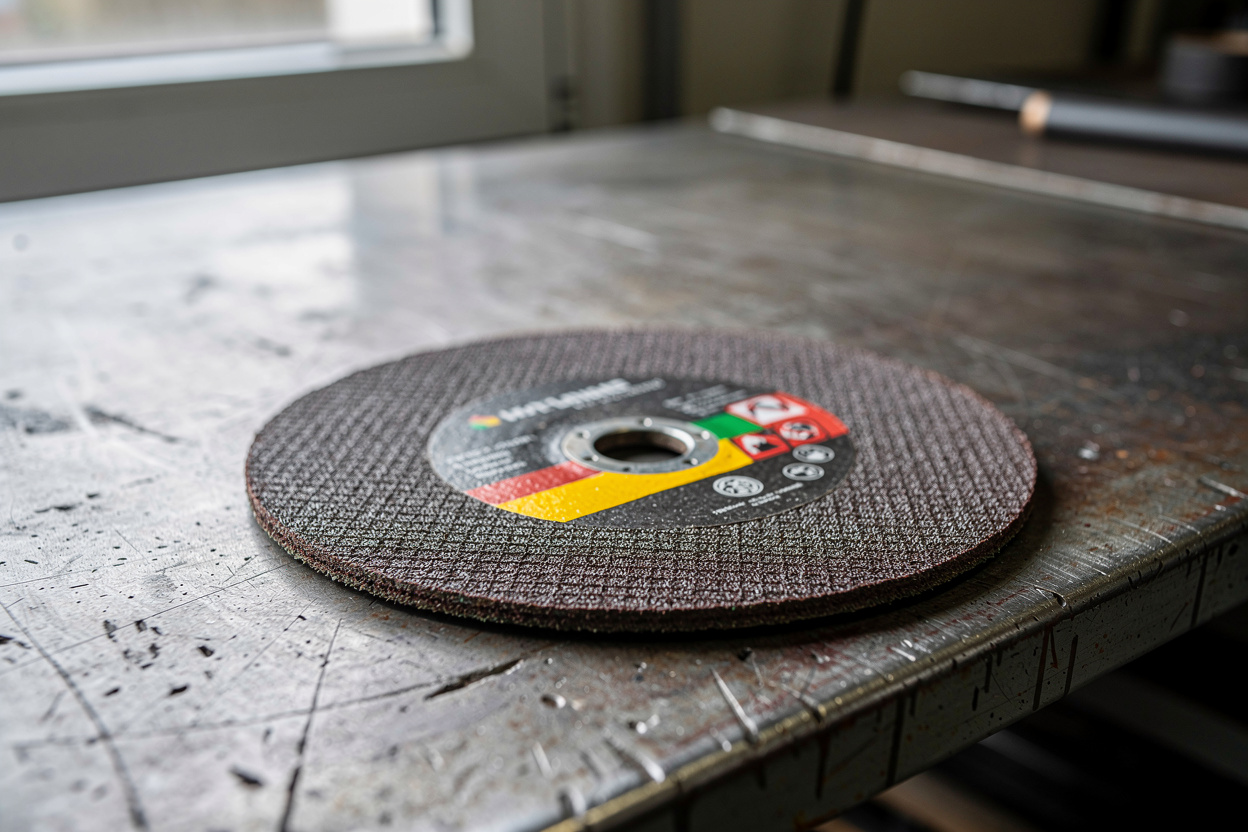
By law, suppliers must mark key information on every wheel with a diameter of more than 80 mm. For smaller wheels, the same information must be provided close to where they are used.

The maximum operating speed must be shown on the wheel in two ways:

  • Rotational speed, in rpm (revolutions per minute).
  • Peripheral surface speed, in m/s (metres per second).

Other important information on the wheel label includes:

  • The wheel type and dimensions in mm: diameter, thickness and bore.
  • The specification: abrasive, grit size, grade, structure and bond.
  • Any restrictions on use, shown as pictograms — for example 'not for hand-held grinding' or 'not for side grinding'.
  • The colour stripe for the speed class: blue 50 m/s, yellow 63 m/s, red 80 m/s, green 100 m/s, and blue with yellow 125 m/s.
  • Mounting instructions and, for organic bonded wheels, the expiry date — resinoid wheels should not be used more than three years after manufacture.
Wheel Speed — Guidance and Conversion
m/s = Ø(m) × π × rpm ÷ 60230 mm @ 6,600 rpm ≈ 80 m/s
Wheel Speed — Guidance and Conversion

More detailed information on wheel speed can be found in the HSE guidance booklet HSG17, 'Safety in the use of abrasive wheels', and in the wheel and machine manufacturers' documentation.

That guidance gives the maximum permitted peripheral speeds in m/s for all types of wheel and grinding process, and tables for converting rpm to peripheral speed for a wide range of wheel diameters.

The conversion itself is simple. Peripheral speed in m/s equals the wheel diameter in metres, multiplied by π, multiplied by the rpm, divided by 60.

For example, a 230 mm angle grinder disc running at 6,600 rpm has a peripheral speed of 0.23 × 3.14 × 6,600 ÷ 60, which is about 80 m/s. That is exactly the red speed class, so a red-striped 80 m/s disc is the minimum that may be fitted to that machine.

Notice that as a wheel wears down and its diameter reduces, its peripheral speed at the same rpm also falls. The danger is always the other way round: a wheel fitted to a machine that turns faster than the wheel was designed for.

Storage and Handling of Wheels
Large wheels: on edge, in divided slotsThin discs: flat, on a level steel shelfDry · cool · never dropped or rolled
Storage and Handling of Wheels

Abrasive wheels must be handled carefully to avoid damage. A damaged wheel is dangerous and must not be used. Inspect each wheel thoroughly before it is used for the first time.

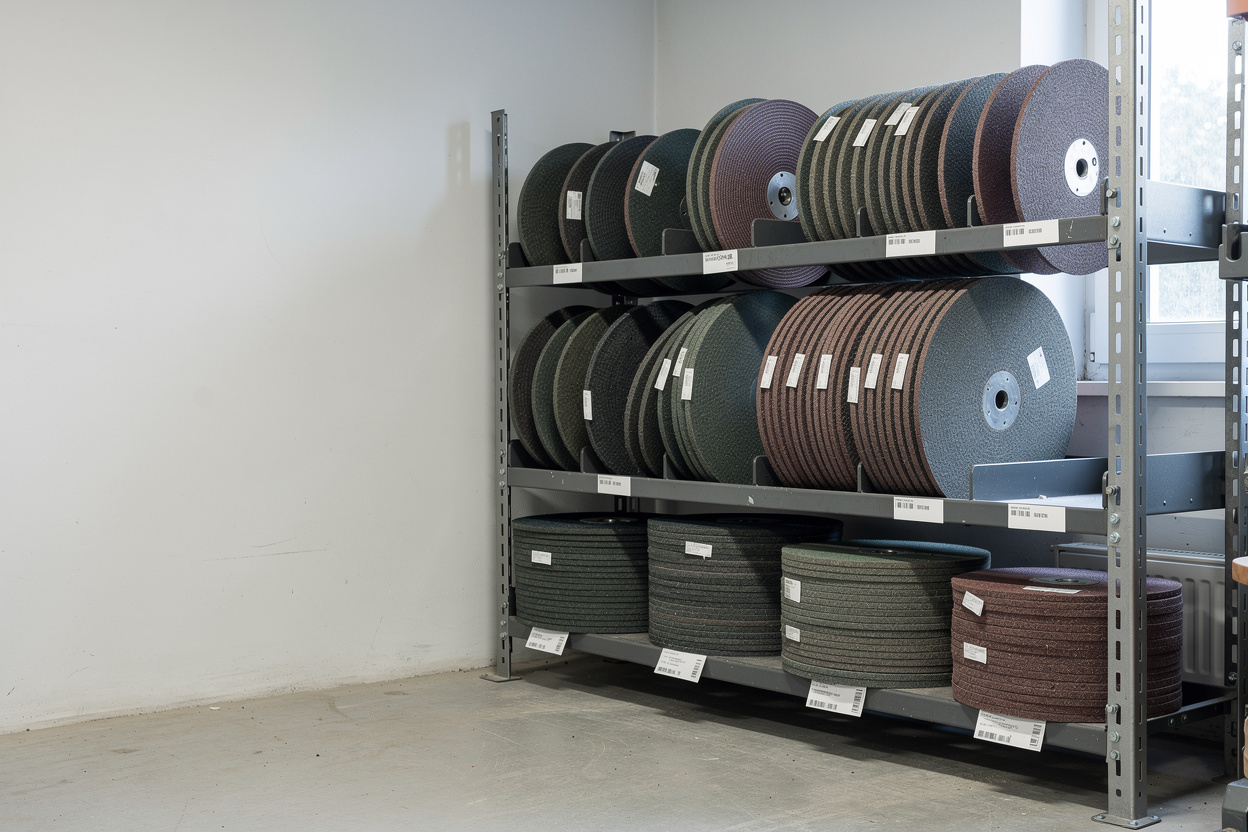
Racks or shelving are the best option for storage, in a dry area away from extremes of temperature. Wheels stored on edge, and the shelves or racks themselves, must have proper support and dividers so that the wheels cannot roll or tip over.

Thin organic bonded wheels and cutting discs should be stored flat on a firm, level surface, for example a steel shelf, away from excessive heat and moisture. This prevents warping. Do not leave blotters or other packaging between stacked thin wheels; use flat separators to keep them true.

Cylindrical wheels and large straight cups can be stored in racks like those used for large straight wheels, or stacked flat with corrugated cardboard between them.

Move large wheels using a barrow or a similar handling aid. Never roll a wheel across the floor, drop it, or lean it against a wall or a machine.

Knowledge Check
How must the maximum operating speed be shown on a wheel of more than 80 mm diameter?
Select one answer, then press Check.
Only as the spindle speed of the machine it fits
As the rotational speed in rpm and the peripheral speed in m/s
On a separate notice in the workplace, never on the wheel itself
As a colour stripe only, with no figures
Correct — well done. You can continue.
Not quite. Think about what you have just learnt in this module, and try again.
Mounting the Wheel — Who May Do It
Trained · competent · appointed
Mounting the Wheel — Who May Do It

If a wheel is not mounted correctly, the risk of it bursting increases sharply. Most mounting failures can be prevented by following the guidance on the next few slides.

Abrasive wheels must only be mounted by trained and competent people. These people, who have completed both practical and theoretical training, must be formally identified by the employer; in many workplaces their names are recorded in a register.

If an abrasive wheel machine is assigned to you, always make sure you have a copy of the safety information for the wheel you intend to mount and for the safe operation of the machine, and read it before you begin.

Never mount an abrasive wheel unless you have been trained and instructed to do so. If you have not been trained, tell your supervisor and wait for a trained person; do not 'just fit it' to save time.

Mounting the Wheel — Checks Before You Start
Right wheel for this machine?Any chips, cracks, warping?Spindle speed ≤ wheel MOS?Bush flush with wheel?
Mounting the Wheel — Checks Before You Start

The following checks are essential before any wheel is mounted:

  • The wheel is the correct type and size for the machine, and is only fitted to the machine it is intended for.
  • The wheel has been carefully inspected and is not damaged in any way. Never use a chipped, cracked or warped wheel, or a wheel that has been dropped.
  • The maximum speed marked on the machine is less than or equal to the maximum operating speed of the wheel. The MOS is shown on the wheel, on the blotter or on an identification label.
  • The bush, if one is fitted, does not project beyond the sides of the wheel and blotters; if it does, it will prevent the flanges from gripping the wheel properly.
  • The spindle, flanges and wheel bore are clean and free from grit, burrs and old blotter material.

If any one of these checks fails, stop. Do not mount the wheel.

Mounting the Wheel — Flanges
Recessed face — bears only on the outer ringEqual diameter, ≥ ⅓ of wheel Ø
Mounting the Wheel — Flanges

The flanges are the two discs that clamp the wheel to the spindle. They carry the driving force and they are what holds the wheel true, so their condition and design matter enormously.

  • Flanges must be at least the specified minimum diameter, normally one third of the wheel diameter. Before use, make sure the bearing surfaces are flat and free from burrs.
  • Except for a single flange used with wheels that have threaded inserts, all flanges must be correctly recessed or undercut, so that they bear on the wheel only at the outer ring of the flange.
  • Flanges must be of equal diameter and have equal bearing surfaces, except for certain internal and cup wheels where the manufacturer specifies otherwise.
  • Tapered flanges must match the taper of the wheel.
  • The wheel should fit onto the spindle easily, without being forced, but should not be a loose fit either.
Mounting the Wheel — Blotters and Tightening
Blotter: slightly larger than the flangeSnug — not over-tightened
Mounting the Wheel — Blotters and Tightening
  • All abrasive wheels must be used with blotters — the paper or plastic washers supplied with the wheel — slightly larger than the flange. They even out the clamping pressure and stop the hard flange face from bearing directly on the abrasive.
  • Blotters must be clean, undamaged and free from creases. Use the blotters supplied with the wheel; never re-use old ones or improvise with cardboard.
  • Tighten the clamping nut just enough to hold the wheel securely so that it cannot move between the flanges. Do not over-tighten, and do not leave it loose.
  • Over-tightening is a common cause of cracked wheels: the wheel is a brittle material, and excessive clamping force sets up stresses that can cause it to burst when it reaches full speed.

Where the manufacturer specifies a tightening torque, use a torque wrench. If the machine has a locking pin, use it; never hold the wheel with your hand while tightening the nut.

Mounting the Wheel — The Procedure
1 Isolate the power2 Inspect + ring test3 Clean wheel, flanges, spindle4 Check spindle speed5 Fit wheel, blotters, flanges, nut
Mounting the Wheel — The Procedure

When mounting an abrasive wheel, work through these steps in order:

  • Isolate the machine from the power supply and make sure it cannot be started by anyone else.
  • Inspect the wheel for defects and carry out a ring test.
  • Clean the bearing surfaces of the wheel, the flanges and the spindle.
  • Check the spindle speed of the machine to make sure it is not too fast for the wheel being fitted.
  • Make sure the spindle is long enough, and threaded far enough, that the nut engages fully once the wheel and flange are in place. The thread should reach into the inner flange, but not into the bore of the wheel.
  • Secure the wheel with a single nut on the spindle. The nut thread must run opposite to the direction of wheel rotation, so that the nut tightens rather than loosens as the wheel turns.
Mounting the Wheel — Finishing and First Run
Stand to one side — never in line with the wheelRun 1 minute at full speed before use
Mounting the Wheel — Finishing and First Run

To finish mounting the wheel, you also need to:

  • Use the blotters supplied with the wheel, one on each side.
  • Tighten the spindle nut just enough so that the wheel cannot move between the flanges. Do not over-tighten.
  • Refit the guard and adjust it, and set the work rest to within 3 mm of the wheel.
  • Before switching on the power, turn the wheel by hand and make sure it turns freely, runs true and does not touch the guard or the work rest.
  • When switching on for the first time, make sure everyone stands to one side, out of the line of the wheel, before it is started.
  • Run the new wheel at full operating speed for at least one minute with nobody in front of it before any work is done. A wheel that is going to fail from a mounting fault will usually fail in that first minute.
Guards and Work Rests
Guard encloses most of the wheelWork rest gap ≤ 3 mmAdjust only with the wheel stopped
Guards and Work Rests

Despite the care taken by manufacturers and in the storage and mounting of abrasive wheels, wheels can still burst. Guards are essential to protect the operator from flying fragments if that happens. The guard must be strong enough to contain the debris from a wheel failure, and it must also protect the user from the dangerous moving parts of the machine.

As far as possible, the wheel should be enclosed by a fixed guard, leaving only the working part of the wheel exposed. On a bench or pedestal grinder the guard should cover roughly three quarters of the wheel; on a portable angle grinder the guard must cover at least half of the disc and be positioned between the disc and the operator's body. Never remove or turn back a guard to get 'better access'.

Work rests must be positioned as close to the wheel as possible, with a gap of no more than 3 mm. Wheel wear is the main reason a work rest needs adjusting. A wide gap lets the workpiece jam between the rest and the wheel, which can shatter the wheel and trap the operator's fingers. Work rests should be checked and adjusted regularly, and only ever with the machine stopped.

Safe Working Practices
Use the work rest — never freehandLight pressure — never slow the motor
Safe Working Practices

The main measures for working safely with abrasive wheels when grinding and cutting are:

  • Use a suitable wheel and machine for the work.
  • Avoid grinding on the flat side of a straight wheel. If side grinding is needed, use a wheel designed for that purpose, such as a cup wheel.
  • Before use, run new wheels at full speed for a minute, making sure everyone is at a safe distance from the machine.
  • Support heavy workpieces and use jigs to reduce vibration on pedestal and bench grinders. This is especially important during prolonged or frequent use, such as tool sharpening.
  • Make sure the work rest is correctly adjusted, with a gap of about 3 mm from the wheel. Never adjust it while the wheel is turning.
  • Stop the machine by switching it off. Never try to slow the wheel by pressing on its edge or face.
  • Do not press the workpiece against the wheel hard enough to slow the motor.
Safe Working Practices — Continued
No loose clothing, rings or watchesCoolant off first — let the wheel dry evenly
Safe Working Practices — Continued

In addition to the previous points, you should also:

  • Dispose of damaged wheels correctly and immediately, so that nobody else can pick them up and use them.
  • Keep the area around the machine clean and free of swarf, dust and trip hazards while it is in use.
  • Use suitable PPE, such as eye and hearing protection, and a dust mask where the risk assessment requires one.
  • Do not wear loose clothing, ties, rings, watches or other jewellery that could be caught by the wheel. Tie long hair back under a hat or hairnet.
  • Introduce the workpiece to the wheel smoothly and gradually. Do not force it against the wheel or jab at it.
  • Take extra care with machines that use coolant. Do not leave the coolant running after use; switch the coolant off and let the wheel keep turning so that it dries evenly. A wheel left standing with one side wet becomes unbalanced and can burst when it is next started.
Inspection and Testing — Wheels
Ring test: tap 45° each side, turn, repeatClear ring = sound · dull thud = cracked
Inspection and Testing — Wheels

Employers must make sure that all abrasive wheels and equipment are inspected and checked regularly, and the people doing the work should check the wheel every time before they start.

When wheels first arrive, unpack them carefully and check for any signs of damage, cracks, chips or missing parts. Remove any dust with a brush, not with compressed air.

Before mounting a vitrified wheel, carry out a ring test. Suspend the wheel on a finger or a small pin through the bore and tap it lightly with a light, non-metallic object such as the handle of a screwdriver, about 45 degrees either side of the vertical centre line, then turn the wheel and repeat. A sound wheel gives a clear ringing note. A cracked wheel gives a dull, dead sound. If you hear that, check for cracks or other defects and take the wheel out of service. The ring test does not work on organic bonded wheels, which do not ring.

When using abrasive wheels, make sure the wheel is not worn. Look for pits or cracks on the sides, or uneven wear on the edge, and replace worn wheels. Also make sure the work rest can still be adjusted to within 3 mm of the wheel surface.

Inspection and Testing — Machines
Guards · cable · isolator · spindleFailed inspection = out of service
Inspection and Testing — Machines

The machines used with abrasive wheels must also be thoroughly inspected and tested at regular intervals. This includes checking:

  • The condition of the machine, its servicing history and all maintenance records, to confirm that any repairs identified earlier have actually been carried out.
  • The electrical supply, including sockets, leads, plugs, connections and the means of isolation.
  • Other power sources, such as compressed air supplies and hoses on pneumatic grinders.
  • That the guards are present, in good condition, undamaged and correctly positioned.
  • That the spindle runs true, the bearings are sound and the flanges are undamaged.
  • The stop and start controls, including any dead-man's switch on portable machines.

Also check all the other protective equipment: dust extraction, eye shields, screens and any other protective devices. Record the inspections, and take any machine that fails out of service until it has been repaired.

Safe Dressing of Abrasive Wheels
Dresser anchored on the work restGlazed or loaded → dress itNever a hammer or chisel
Safe Dressing of Abrasive Wheels

Wheel dressing is an important process for keeping an abrasive wheel in good condition. Dressing removes material from a wheel that has become dull through glazing (the abrasive grains wearing smooth) or loading (the spaces between the grains clogging with metal). It restores the cutting surface, trues the wheel so that it runs round, and protects the wheel, the machine and the operator from damage.

Wheels should be dressed regularly using suitable tools designed for that type of wheel. There are many types of dresser: star or 'Huntington' dressers with rotating cutters, abrasive stick dressers, and single-point or multi-point diamond dressers. Wheel and machine manufacturers provide information on the safe dressing methods for their equipment.

The HSE sets out the main safety requirements for dressing:

  • Hand dressers must be properly supported: use the work rest where possible, or another suitable support. Never dress freehand.
  • Rotating cutter dressers should use their lugs as an anchor against the work rest.
  • Take precautions so that the dressing tool cannot become trapped between the wheel and the work rest or the machine.
  • Before dressing, make sure the work rest is in good condition and correctly adjusted.
  • Wear eye protection and, where needed, a dust mask; dressing throws off a lot of abrasive dust.
  • Never use dangerous techniques such as a chipping hammer, a cold chisel or striking the workpiece against the wheel.
Summary

In this module you have learnt that:

Replace grinding and cutting with abrasive wheels where possible, and use engineering controls such as guards, screens and dust extraction before relying on PPE.

It is essential to understand the information marked on both wheels and machines, above all their maximum operating speeds. Never mount a wheel on a machine whose spindle speed is higher than the wheel's maximum speed.

Wheels must only be mounted by a trained, competent person: inspected, ring-tested, fitted with clean blotters and correct flanges, and tightened just enough. Then run for a minute with everyone to one side.

Guards are essential on every abrasive wheel machine and must be fitted whenever it is used, with the work rest within 3 mm of the wheel. Inspection includes ring-testing wheels before mounting, and regular checks of both the wheels and the machines. Wheels must be dressed regularly, with the dresser supported on the work rest, to keep them in good condition. In the final module we look at the remaining hazards: eyes, dust, vibration, noise, fire and electricity.

Knowledge Check
Which of the following is NOT part of working safely with an abrasive wheel?
Select one answer, then press Check.
Grinding on the flat side of a straight wheel
Tying back long hair so that it cannot be caught by the wheel
Running a newly mounted wheel at full speed for one minute before use
Wearing the eye protection required by the risk assessment
Correct — well done. You can continue.
Not quite. Think about what you have just learnt in this module, and try again.
Next Module →Answer the question to unlock the next module.
Page 1 of 24